.svg)
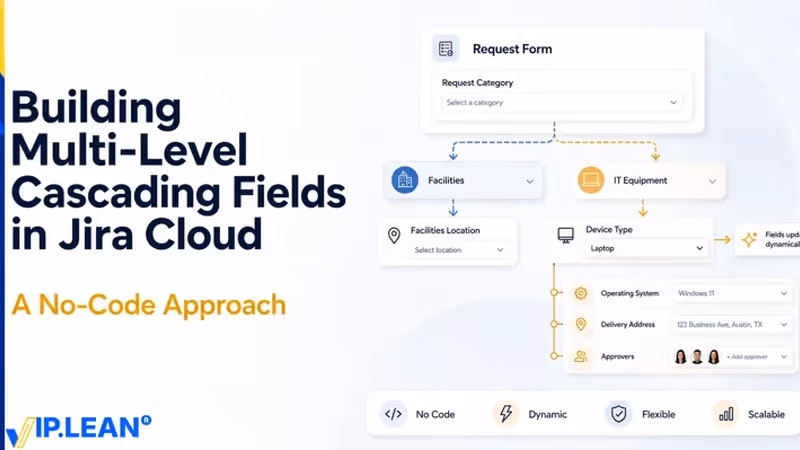
Building Multi-Level Cascading Fields in Jira Cloud: A No-Code Approach
Learn how to build multi-level cascading fields in Jira Cloud with no-code behaviours, reusable conditions and dynamic logic.Done.
2013: Doctor of Computer Science. 2021: Master of Business Administration (MBA). 13 years of experience in project management.
.avif)
Jira's native Cascading Select field gives you one parent and one child within a single field. The moment you need a third level, or you want one selection to show or hide entirely different fields, you're out of options natively.
This article walks through how to solve that — with a concrete example you can follow action by action.
The Problem: What Jira Can't Do Natively
Here is a requirement that comes up constantly in teams managing requests:
"When someone submits a request, I want the form to adapt based on what they need — not show them a wall of irrelevant fields."
A simple example could look like this:
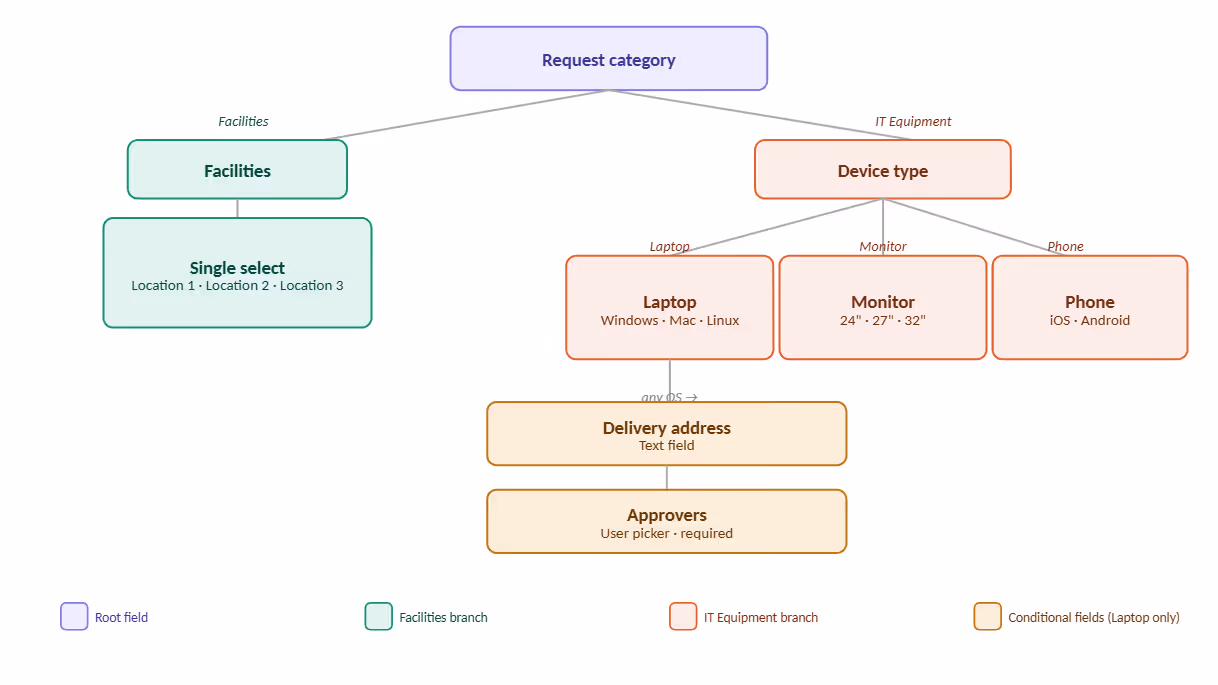
- Selecting Facilities is straightforward — one follow-up field with three location options. Selecting IT Equipment opens a cascading field (Device Type) with three devices, each with its own child options. And if Laptop is selected, two additional fields appear regardless of which OS is chosen.
What Native Jira Gives You
Native Jira configuration can cover simple cases, but this specific pattern needs more dynamic field behaviour.
None of these covers the scenario above. You need cross-field visibility logic — and that requires going beyond native Jira.
The Solution: Field Behaviour Apps
Several Marketplace apps can help with dynamic field behaviour in Jira Cloud.
Some tools provide scripted behaviour logic. Others provide a no-code or low-code interface that lets admins build rules using triggers, conditions, and actions.
For the walkthrough, the examples use VIP.LEAN Behaviours Builder to demonstrate the no-code version of this pattern.
Step 1: Creating the Behaviour
The first step is to create the behaviour itself — you give it a name, assign it a context (which issue type and project it applies to), set a status, and assign a responsible user.

Step 2: Building the Actions
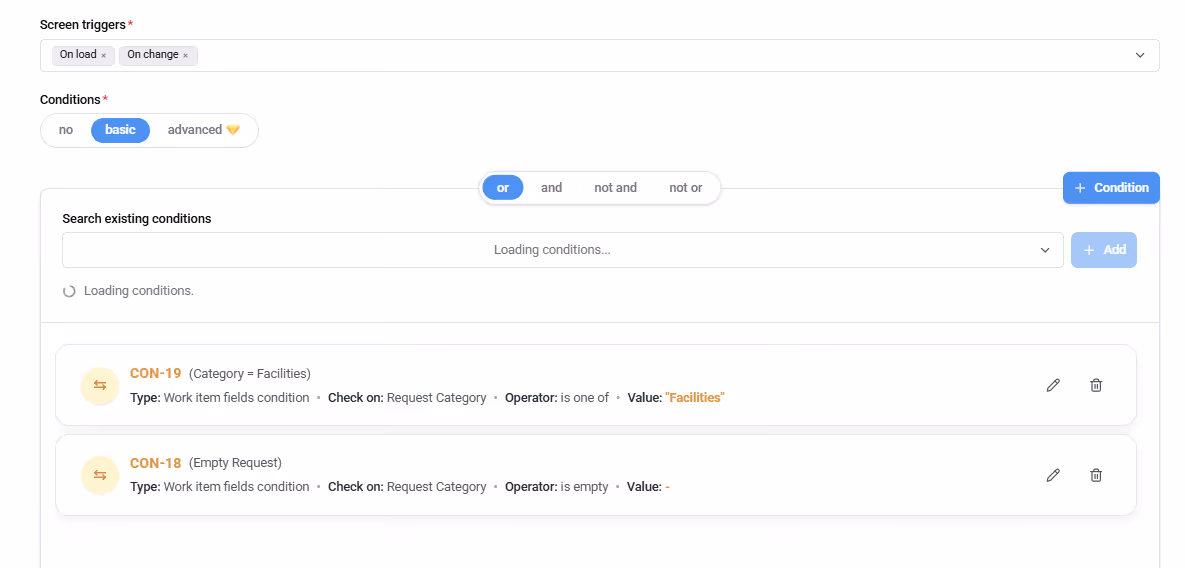
This is where the actual logic lives. Each action defines how one field should behave on one or more Jira screens. It can be triggered on load and/or on change, so the form reacts whether the page just opened or the user changed a value.
Conditions are created inline as you build each action. Once created, they become available in a dropdown for all subsequent actions — from this behaviour or any other. This is where things get efficient: you define a condition once, then reuse it as many times as needed, combining them with AND / OR logic.
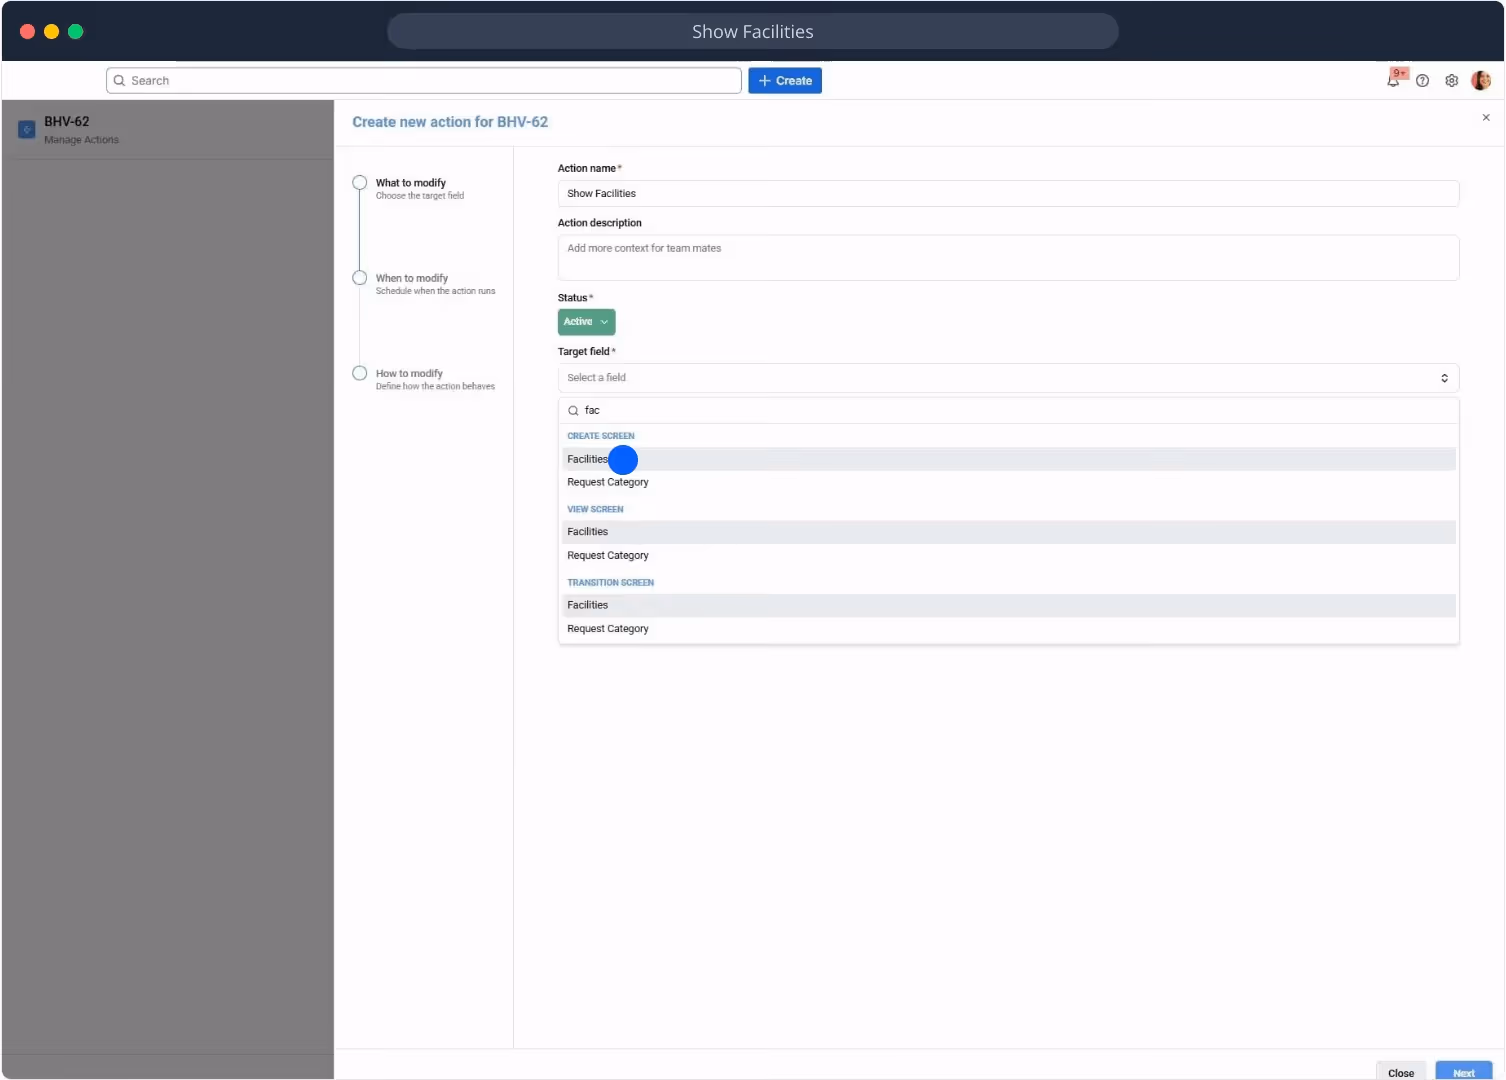
Action 1 — Show Facilities field
The first action displays the Facilities field when the user selects Facilities in the Request Category field.
- Trigger: On load + On change
- Condition: CON-19 — Request Category = Facilities
- Modification: Set Facilities visibility = Yes
Action 2 — Hide Facilities
Now we need the opposite behaviour.
If the Request Category is empty, or if the user selected IT Equipment, the Facilities Location field should not be visible.
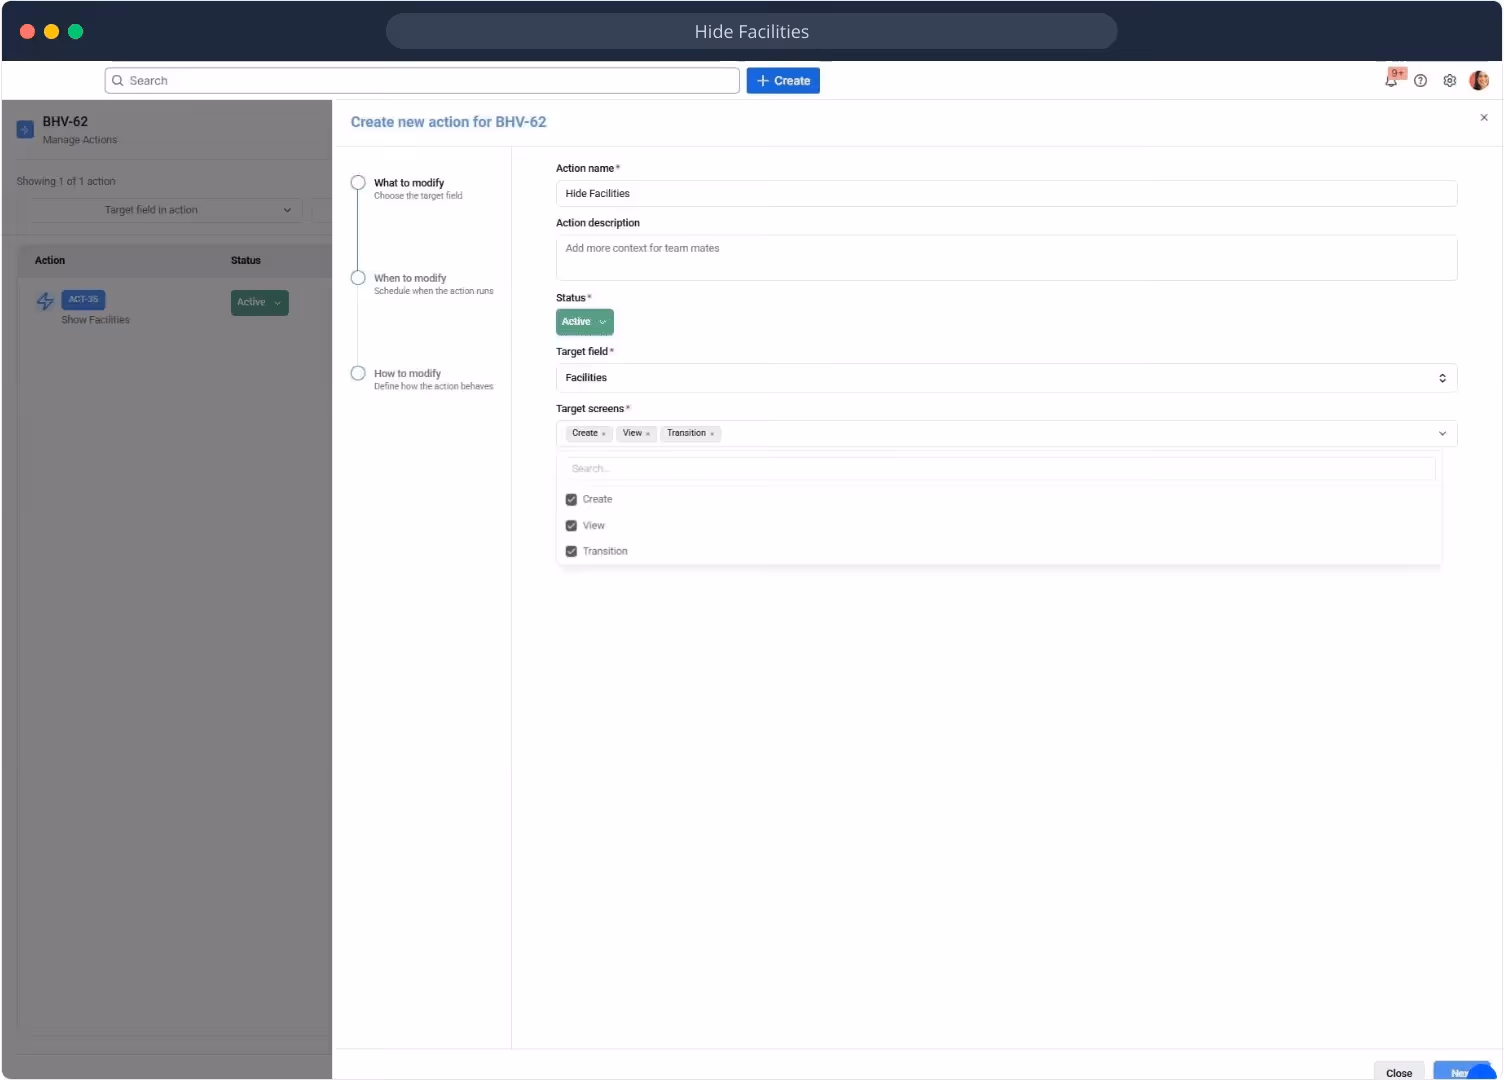
This is the core pattern: the same condition that showed a field in Action 1 helps define the opposite logic in Action 2. One condition, two jobs.
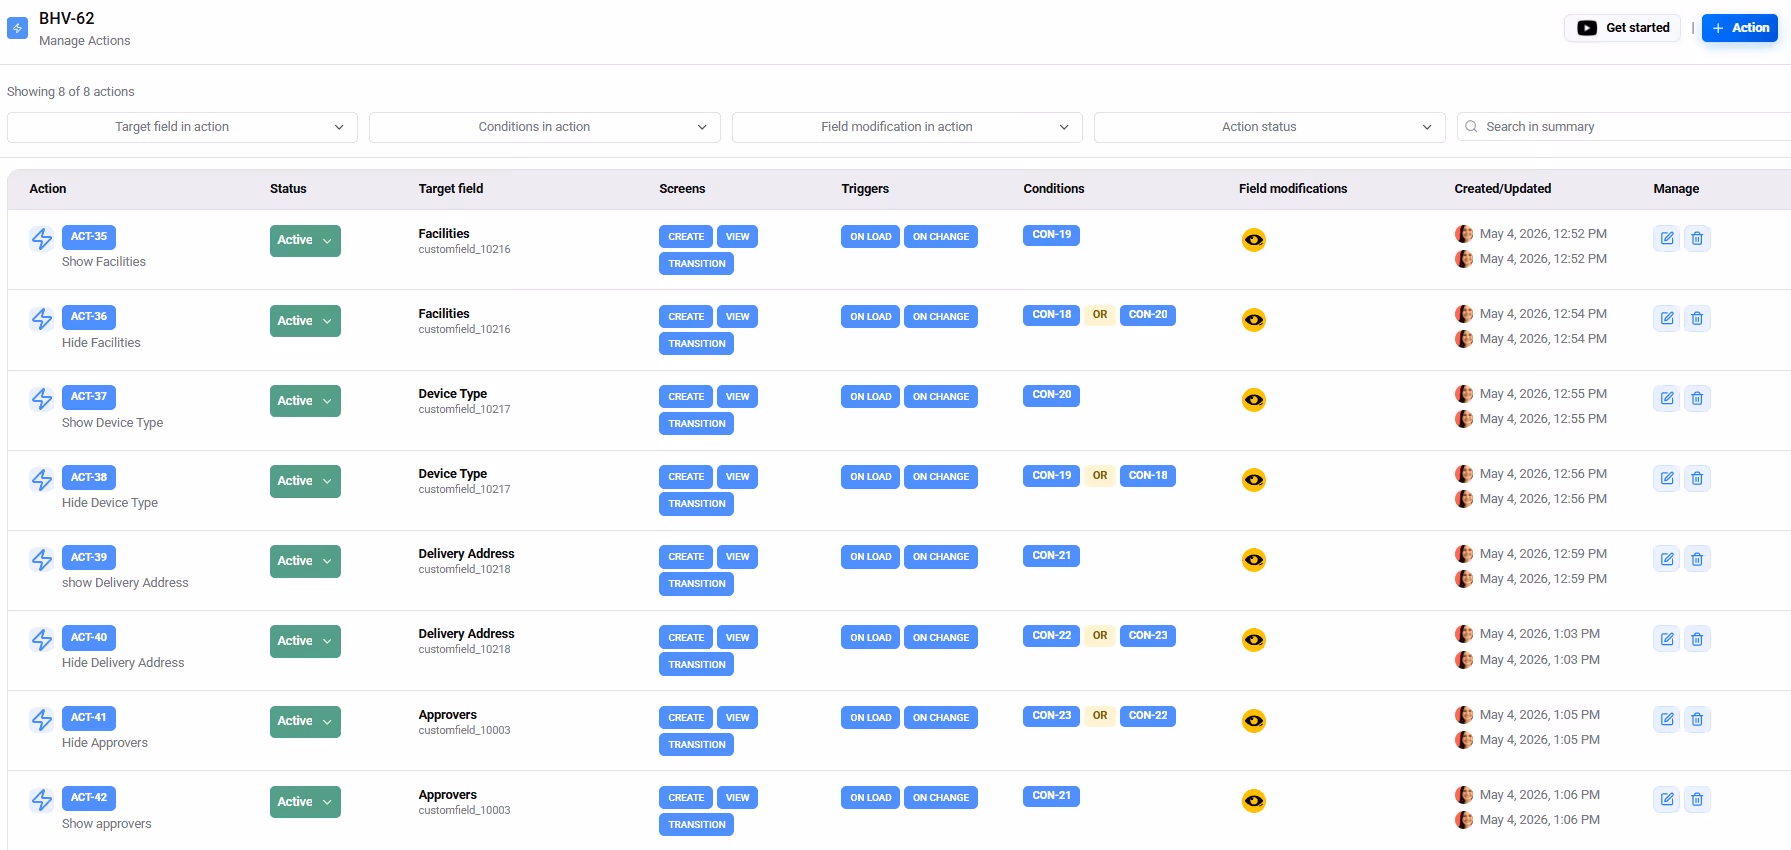
Actions 3 & 4 — Device Type
The same pattern now applies to the Device Type field. Device Type should appear only when the category is IT Equipment.
- Action 3: Show Device Type → CON-20 : Request Category = IT Equipment
.avif)
- Action 4: Hide Device Type → CON-18 OR CON-19
Remaining Actions — Delivery Address and Approvers
Now we go one level deeper with Delivery Address and Approvers, this time driven by the Device Type value. No need to walk through each one — by now the logic is the same: one action to show, one to hide, conditions reused from the dropdown.
The Result
With all actions in place, the Jira issue screen now adapts as the user makes selections.
If the user selects Facilities, they only see the Facilities Location field.
If the user selects IT Equipment, they see Device Type.
If they then select Laptop, the Delivery Address and Approvers fields appear.
If they change their mind and select another category, fields that no longer apply are hidden.
.gif)
What Makes This Approach Powerful
A few things worth taking away beyond the specific example:
One behaviour, full clarity. All the logic for a form lives in one place. Easy to read, easy to hand over to someone else, easy to extend later.
Conditions are assets. Every condition you create becomes reusable across all your actions and behaviours. The more you build, the less you recreate from scratch.
Final Thoughts
Dynamic forms are one of the areas where native tooling leaves the most room. The pattern here scales well: more fields, more branches, more conditions — it all follows the same structure without getting complicated.
Links:
Links:
- Free Trial on: Atlassian Marketplace
- Why Behaviours in Jira Cloud Shouldn't Require a Developer
- Adapt Options for a Select Field by Work Type in Same Space- No Code Behaviours Builder Show Case
- Bringing Dynamic Field Behaviours to the JSM Customer Portal
Start your free trial and get up to
35% discount!
.svg)