.svg)
.svg)
How to Create and Link Issues?
Create and link Jira issues with VIP.LEAN buttons, configure fields, links, and end user actions.
1 How-To Video
2 Installation Guide
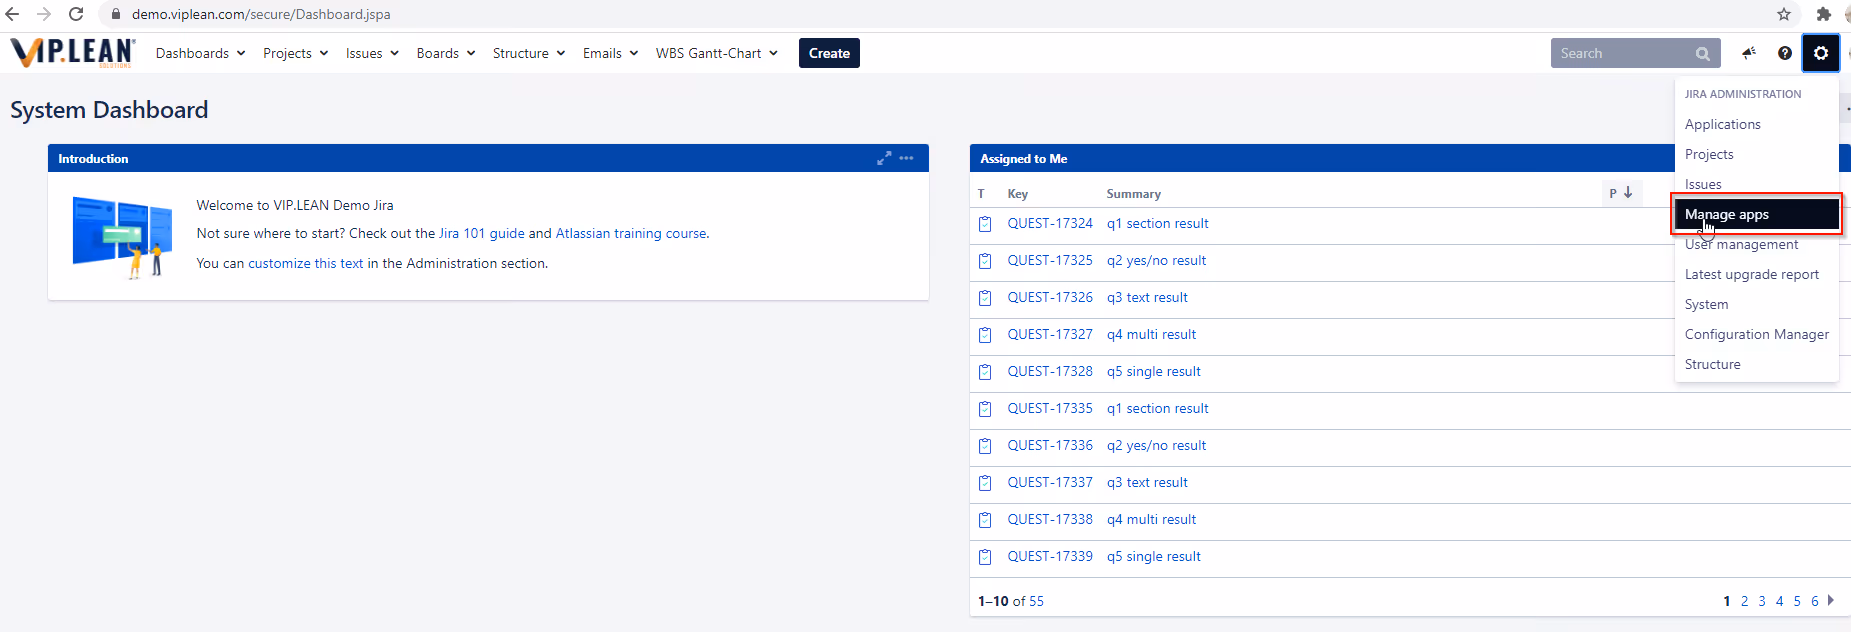
2.1 Navigate to “Manage Apps”
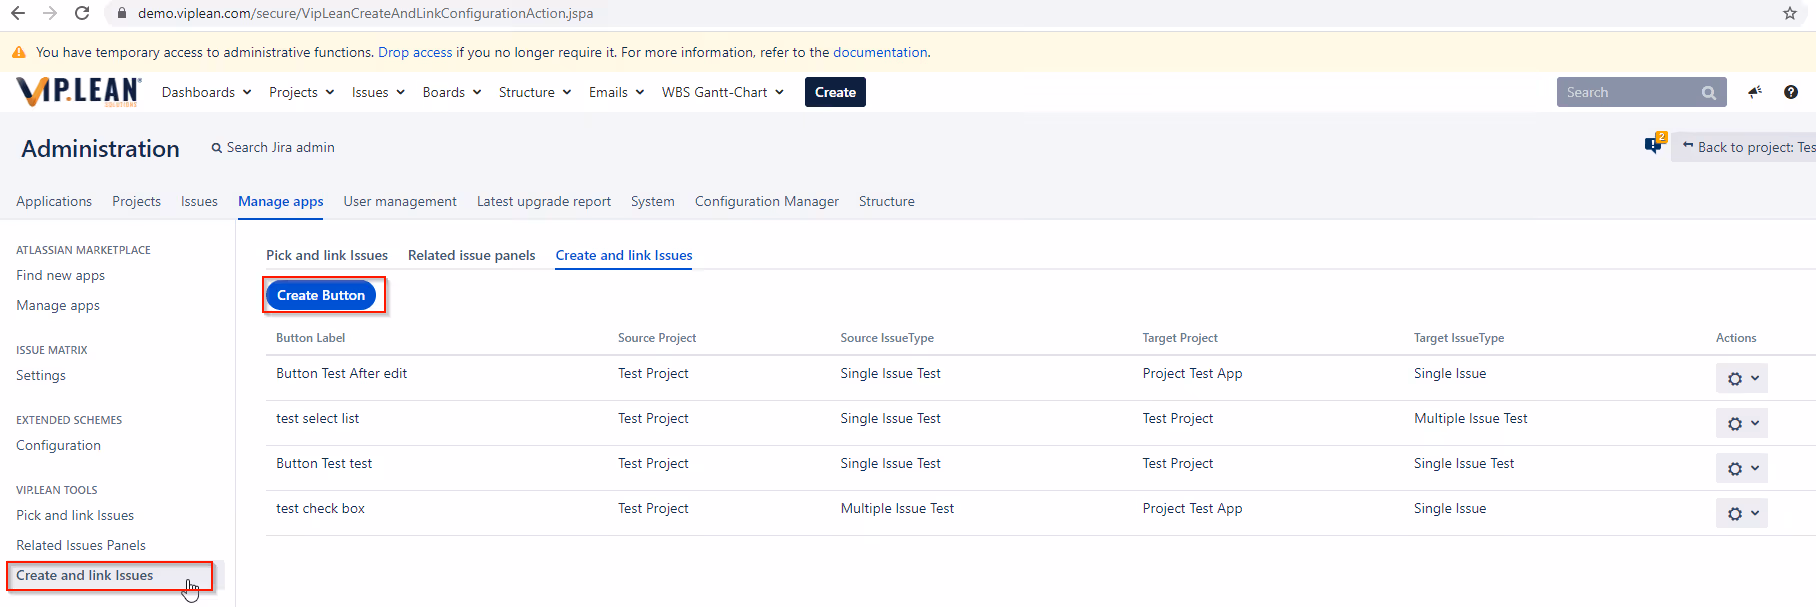
2.2 Navigate to “Create and link Issues” and to create a new button click on “Create Button”
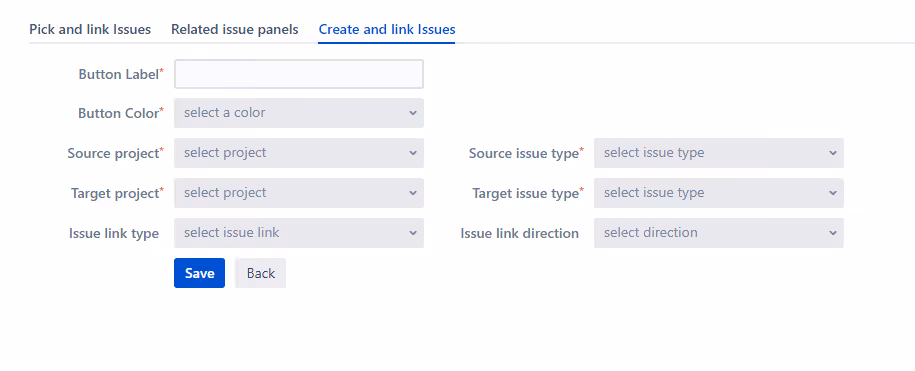
2.3 Configure the button
2.4 Configure the fields of the create screen
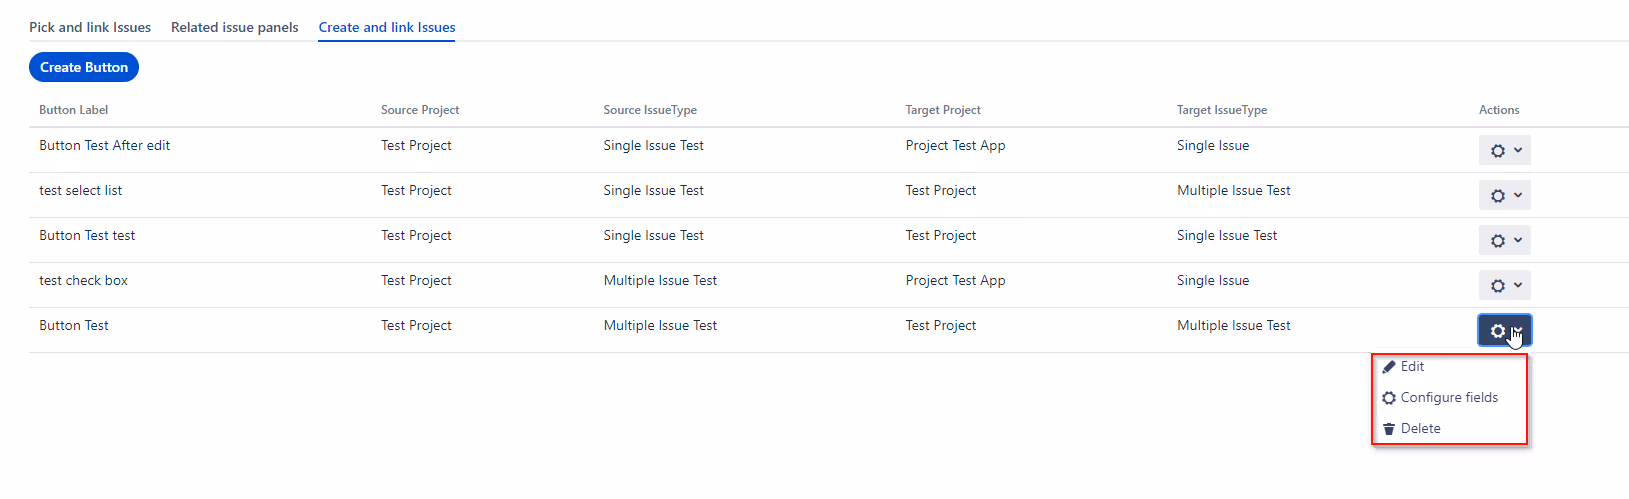
In the list of buttons, please select “Configure fields” to start the configuration of create screen fields:
A configuration screen will appear with all fields, which are part of the create screen of your target issue type:

- The fields shown in this list (Configure Fields) are the same as in the create screen of the target project.
- The admin can hide any field in this list and configure it.
- System field “Versions” and “Components” are visible only if source and target project are the same.
- The required fields have only three options (String, source field and source issue key).
- The target field > target field filling is executed by the App immediately after the issue creation.
To consider:
For the selected source fields, only eligible fields should be selected for automated filling (They could be source or target fields):
2.5 End users can start using the create and link button
Once the button has been configured, it will be displayed in the source issue type. A click on this button start a pop-up create screen.
.avif)

Target issue type and link are created automaticly:


Integrate your CRM with other tools
Venenatis sollicitudin posuere elit consequat et enim. Neque tortor amet dictum tempor. Leo facilisis aliquet viverra scelerisque eleifend viverra est. At massa erat vel amet enim laoreet dictum pellentesque. Urna cursus quam pulvinar tellus. Duis fermentum nibh volutpat morbi. Et ac sed ultricies ut nunc.
How to connect your integrations to your CRM platform?
Et urna ac et maecenas fusce amet. Nibh nec commodo massa sed. Tincidunt porttitor in pharetra egestas sit neque ac lacus. Amet a nunc et cum. Odio at volutpat volutpat in leo eget ipsum diam elementum. Erat magna arcu orci.
- Morbi fringilla molestie magna sed dictum. Praesent pharetra.
- Cras mi purus, viverra vitae felis sit amet, tincidunt fringilla lorem.
- Non mattis urna ex nec sem. Donec varius diam et suscipit.
- Quisque euismod posuere lacus sit amet volutpat praesent.
Quis faucibus massa sit egestas. Sit fermentum est ac pulvinar et sagittis sed sit ut. Quis faucibus aenean nibh vestibulum enim mi sit. Sollicitudin ultrices ultrices in ipsum urna fringilla massa leo. Sapien ultricies vitae rhoncus molestie purus. Urna urna dolor euismod porttitor et. Magna adipiscing dictum et adipiscing.

Quis faucibus massa sit egestas. Sit fermentum est ac pulvinar et sagittis sed sit ut. Quis faucibus aenean nibh vestibulum enim mi sit. Sollicitudin ultrices ultrices in ipsum urna fringilla massa leo. Sapien ultricies vitae rhoncus molestie purus.
Infotech is the next-gen CRM platform designed for modern sales teams
Cursus curabitur euismod vel fermentum sapien non dolor odio vel. Tortor lectus mauris in praesent a tincidunt nam. In aenean odio aliquet pretium viverra elit quis magna. Eget ut risus posuere velit purus nisi nec sollicitudin tellus enim.
“Sed id mi eget urna facilisis pharetra. Nunc viverra est at magna maximus consectetur. Sed nec maximus augue. Aliquam commodo sem eu.”
Cursus curabitur euismod vel fermentum sapien non dolor odio vel. Tortor lectus mauris in praesent a tincidunt nam. In aenean odio aliquet pretium viverra elit quis magna. Eget ut risus posuere velit purus nisi nec sollicitudin. Tellus enim interdum neque sit vestibulum lacus. Nam pulvinar a lectus justo aliquet.
Why using the right CRM can make your team close more sales?
Sed non quis tellus velit orci. Quam sed mauris elementum tempor viverra. Luctus semper risus ipsum id diam praesent. Pretium eget mauris ultrices curabitur sed sem amet. Erat nulla habitant in mattis massa mi adipiscing.
- Morbi fringilla molestie magna sed dictum. Praesent pharetra.
- Cras mi purus, viverra vitae felis sit amet, tincidunt fringilla lorem.
- Non mattis urna ex nec sem. Donec varius diam et suscipit.
- Quisque euismod posuere lacus sit amet volutpat praesent.
What other features would you like to see in our product?
Sed non quis tellus velit orci. Quam sed mauris elementum tempor viverra. Luctus semper risus ipsum id diam praesent. Pretium eget mauris ultrices curabitur sed sem amet. Erat nulla habitant in mattis massa mi adipiscing ullamcorper condimentum. Erat quisque integer tincidunt ac amet.